Integrate Salesforce with PUBLITRAC
PUBLITRAC and Salesforce are compatible for a full synchronization of your leads, contacts and campaigns. There are several options available like synchronization of your fields, the direction of the synchronization, custom fields and templates (see the document at the end of this article).
1. Initial Configuration
The customer must complete a questionnaire provided by Publipage to identify the options for the synchronization.
This questionnaire asks to identify the fields to associate, the custom fields, the initial full synchronization, and other options.
The document is called Salesforce-Integration - en.docx and must be completed by the client in order to be able to configure the software.
2. Installation of PUBLITRAC APEX
Once the configuration is completed, the customer must install the APEX developed by Publipage.
a. Firstly, you must choose the user with which you will install the APEX.
Note that all new leads that will transfer from PUBLITRAC to Salesforce will have their own 'owner' associated with the user you chose for the installation. It is the responsibility of the client to associate all new leads to their respective owners within Salesforce.
b. Following are the installation links depending on the Salesforce Editions:
Group Edition:
https://login.salesforce.com/packaging/installPackage.apexp?p0=04tA00000002vXU
Professional Edition:
https://login.salesforce.com/packaging/installPackage.apexp?p0=04tA00000002vXP
Enterprise Edition:
https://login.salesforce.com/packaging/installPackage.apexp?p0=04tA00000002vXP
The following tutorial will go through each step with a brief explanation of each.
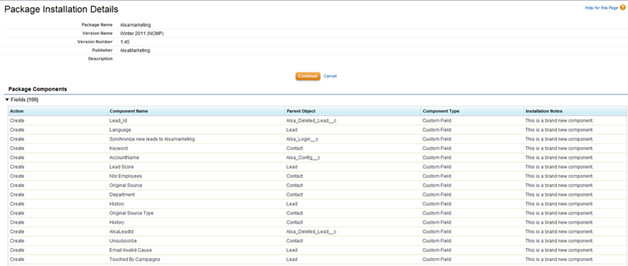
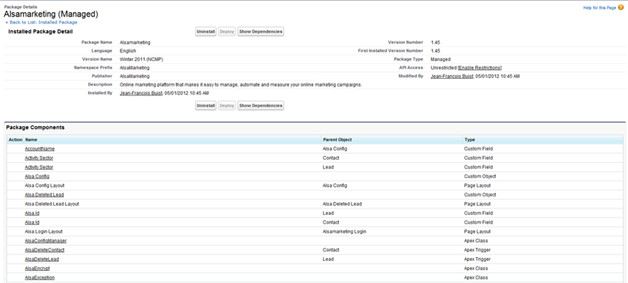
1. Installation details: this step lists the items that will be installed on Salesforce.
2. Click on Continue (orange button).
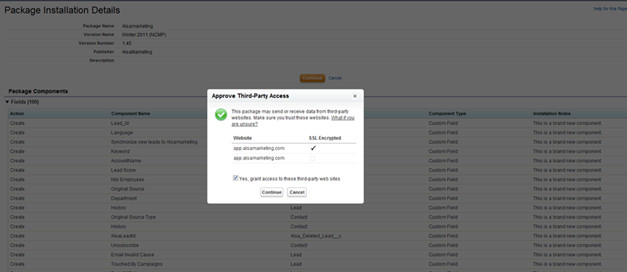
3. Approve Third-Party Access: this step asks the user to authorize access to the PUBLITRAC API.
4. Check the Yes box, which gives access to other websites.
5. Click Continue.
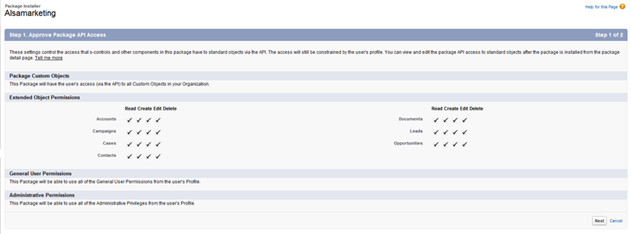
6. Approved Package API Access: this window shows the items that will be available through the API.
7. Click Next.
8. Install package: this stage seeks permission to install everything.
9. Click Install.

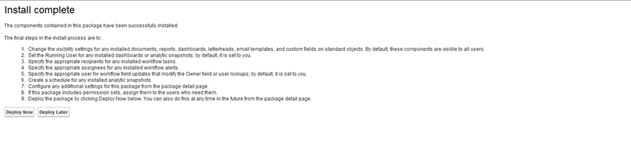
10. Installation completed: this step confirms that the installation is complete and you are now ready to put in other components.
11. Click Deploy Now.
12. Deploy Package: this step shows the items that will be added to Salesforce.
13. Click on Deploy.

14. Deployed Package Summary: the installation is completed. This step shows you a summary of the installation process.
3. Start the synchronization with PUBLITRAC
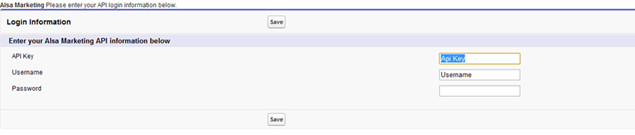
PUBLITRAC will give you a key for its API, a username and a password for Salesforce. Use this information to start the synchronization.
a. PUBLITRAC login screen.
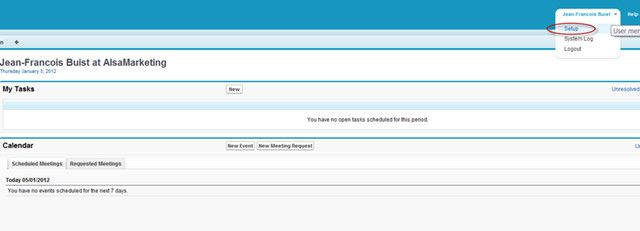
1. Click on the item in the PUBLITRAC application in the menu which is top right of the window.

2. In the main menu, choose PUBLITRAC API Login.

b. Confirmation and synchronization.
1. Enter the API key, the username and the password given by PUBLITRAC.
c. Confirmation of synchronization
There will be a confirmation message saying that the synchronization has begun.

4. Configure your layouts
Once the installation and synchronization completed, you can customize your leads and your layouts in order to include the PUBLITRAC field. These fields provide a list of information about PUBLITRAC as for example the history, the scoring, Web statistics, etc.
It is recommended that the user add 2 new sections that will contain a summary and a details section. Here's what we suggest:
Following are the steps to add these sections:
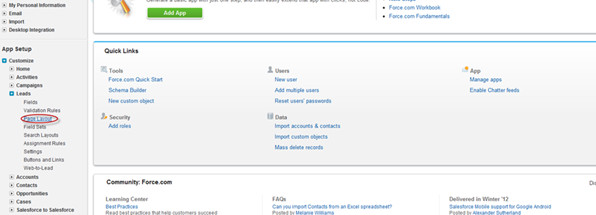
1. Go to the Salesforce Setup section in the right hand corner.
2. Select Page Layout in the menu on the left, under Leads/Customize/Page Layout. The user can edit the layout of the "leads" and contacts. The following tutorial shows you how to format the leads only, but the same approach can be used for the formatting of the contacts.
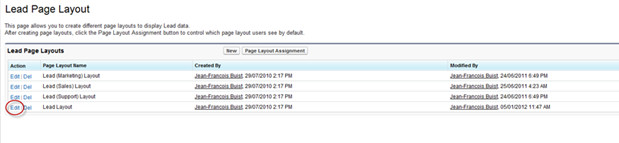
3. Choose the layout you want to change.
4. This is the page layout builder. It allows you to customize the layouts of your leads and contacts in order to see them on the screen and edit them. All the fields can be moved.
5. Add an empty space after the last section.
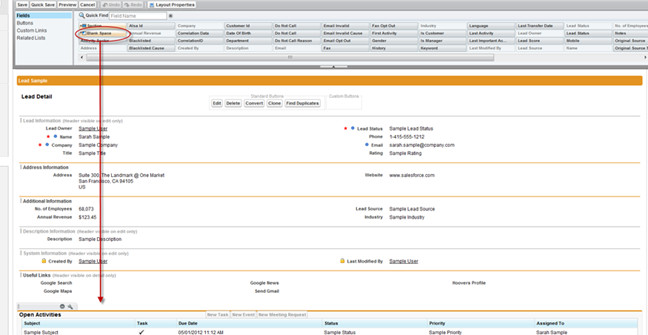
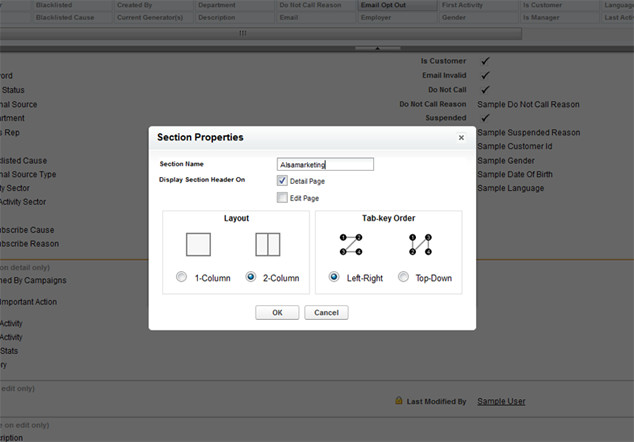
6. To create a new panel, drag and drop a new section where you want to add specific fields coming from PUBLITRAC.
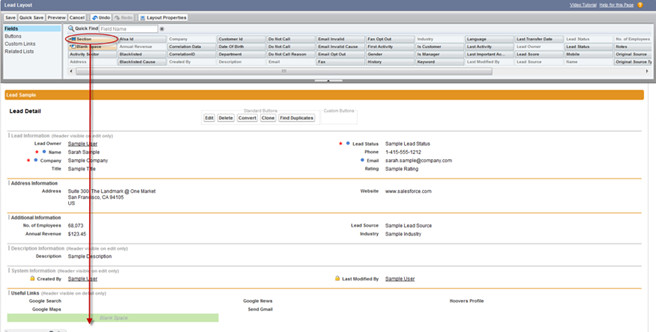
7. For the configuration of the section, we suggest that the first section consists of a 2-column layout and that you name it PUBLITRAC. As for the second section, the layout should consist of 1 column and it could be called PUBLITRAC Details.
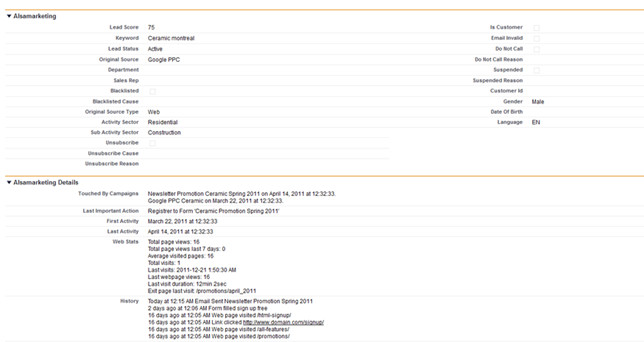
8. The first section contains the lead scoring, keywords, information on blacklists, the departments, the sources, the opt-outs, the information on email, etc. You don't have to add all the field; choose only those that will be useful for your organization.
9. The second section contains detailed information on your leads’ actions on your digital media. You will be able to see what they've done online through your PUBLITRAC campaigns.
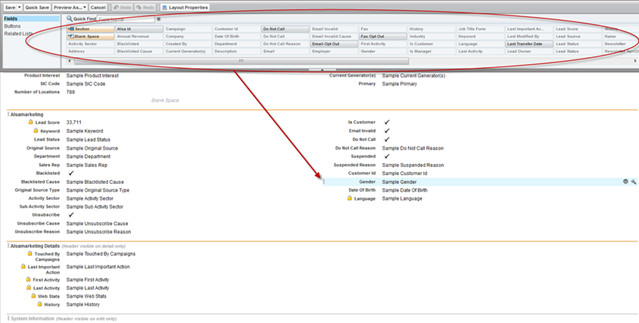
10. Once you have finished entering your information, save and you'll see 2 panels appear for details of your leads. If you also want to synchronize your contacts, do the same process with the Contact section.

The configuration is complete. Now, users will have access to a wide range of information such as the interests, personal information and the behaviors for each lead. Bottom of Form