PUBLITRAC and Salesforce are compatible for a complete synchronization of leads, contacts and campaigns. There are many options available such as the fields to synchronize, the direction of synchronization, custom fields, and page layouts. (See documents at the end of this article).
...
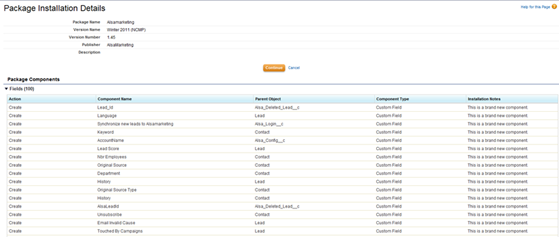
1.Package installation details. This step lists the components that will be installed to the Salesforce instance.
2.Click Continue.
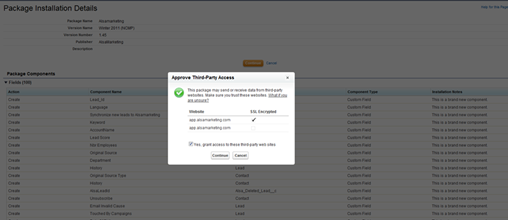
3.Approve Third-Party Access. This step requires the user to grant access to PUBLITRAC's API.
4.Check the box Yes, grant access to these third-party web sites.
5.Click Continue.
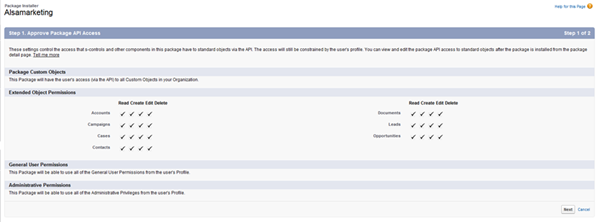
6.Approve Package API Access. This screen displays the components that will be available through the API.
7.Click Next.
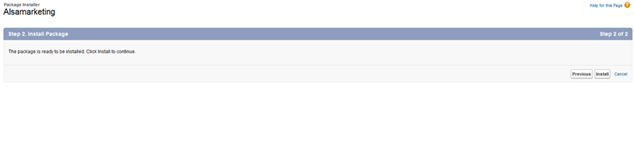
8.Install package. This step requires a confirmation to install the package.
9.Click Install.
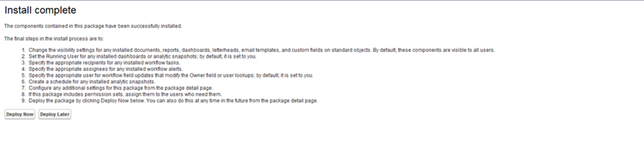
10.Installation completed. This step confirms that the installation was completed and is now ready to deploy the package.
11.Click Deploy Now.
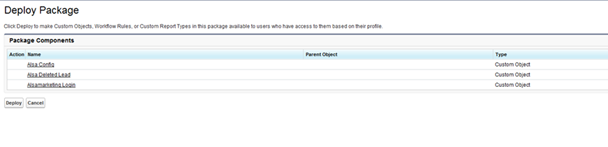
12.Deploy Package. This screen shows the components that will be added to your Salesforce instance.
13.Click Deploy.
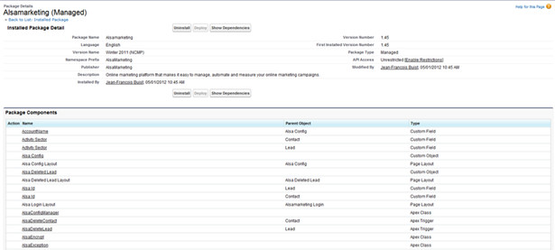
14.Deployed Package Summary. Installation is done. This step shows a summary of the installation process.
Start synchronization with
...
PUBLITRAC
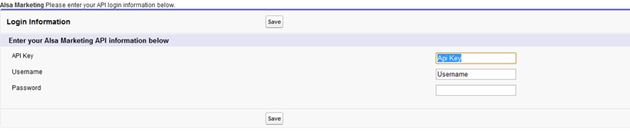
PUBLITRAC will provide you an API key, username and password for your Salesforce instance. Use that information to start the synchronization.
1.PUBLITRAC Login Screen.
a.Click on the PUBLITRAC application item in the top left menu

b.Then on the main menu, choose
...
PUBLITRAC API Login

2.Credentials and synchronization
a.Enter the API key, username and password provided by PUBLITRAC
3.Synchronization confirmation
There will be a confirmation message saying that the synchronization has started.

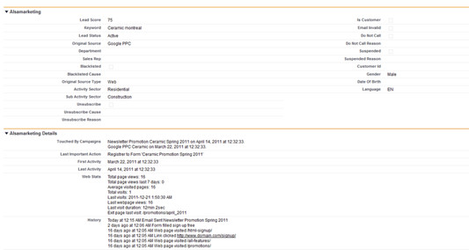
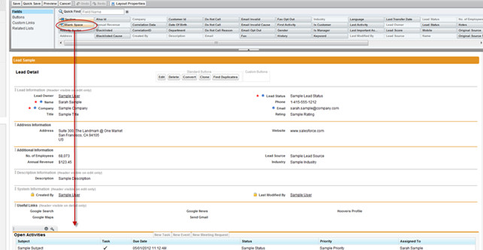
Configuring your page layouts Once the installation and the synchronization are done, you can customize your lead and contact page layouts to display PUBLITRAC’s extra fields. These fields list PUBLITRAC’s specific information such as History, Scoring, Web stats, etc.
It is recommended that the user adds 2 new sections which will contains a summary and a detailed panel. Here is a preview of what we suggest.
Here are the steps to add these sections:
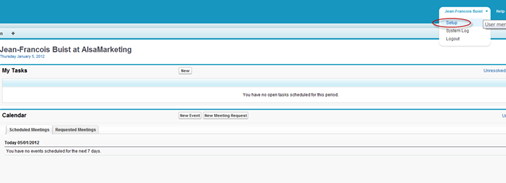
1.Go to the setup section of Salesforce at the top right corner.
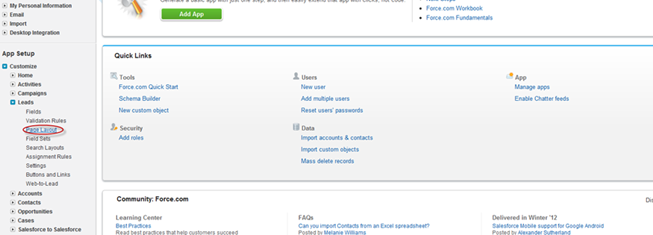
2.Select the Page Layout option placed in the left menu, under Cutomize/Leads/Page Layout. The user can edit the layouts of lead and contact. The following tutorial shows how to setup the lead layout only but the same process applies to contact layout.
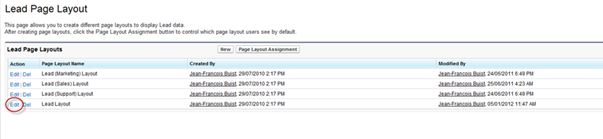
3.Choose the desired layout to edit.
4.This is the page layout builder. It allows you to fully customize your lead and contact layouts both for view and edit. All fields can be dragged & dropped.
5.Add a blank space after the last existing section.
6.To create a new panel, drag’n’drop a new section where you want to add the PUBLITRAC specific fields.
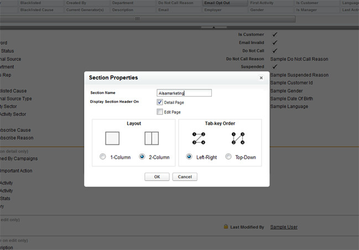
7.In terms of section configuration, we suggest that the first section use the 2-Column layout and be named
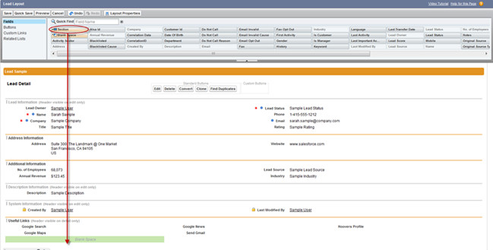
Once the installation and the synchronization are done, you can customize your lead and contact page layouts to display PUBLITRAC’s extra fields. These fields list PUBLITRAC’s specific information such as History, Scoring, Web stats, etc.
It is recommended that the user adds 2 new sections which will contains a summary and a detailed panel. Here is a preview of what we suggest.
Here are the steps to add these sections:
1.Go to the setup section of Salesforce at the top right corner.
2.Select the Page Layout option placed in the left menu, under Cutomize/Leads/Page Layout. The user can edit the layouts of lead and contact. The following tutorial shows how to setup the lead layout only but the same process applies to contact layout.
3.Choose the desired layout to edit.
4.This is the page layout builder. It allows you to fully customize your lead and contact layouts both for view and edit. All fields can be dragged & dropped.
5.Add a blank space after the last existing section.
6.To create a new panel, drag’n’drop a new section where you want to add the PUBLITRAC specific fields.
7.In terms of section configuration, we suggest that the first section use the 2-Column layout and be named
...
‘PUBLITRAC’, and the second layout use 1-Column and be named ‘PUBLITRAC Detail’.
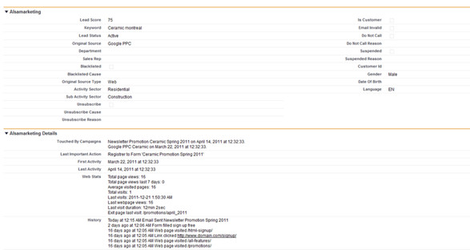
8.The first section contains lead score, keyword, black listed info, department, sources, unsubscribe, emails info, etc. You do not have to add all fields; only choose the ones that will be useful for your organization.
9.The second section contains detailed information about the actions performed online by your leads. You’ll be able to see what action they have performed online through your PUBLITRAC campaigns.

10.Once you are done with placing your information, save and then you’ll see the 2 panels appear in the leads details. If you wish to synchronize your contacts as well, you should do the same process with the
‘PUBLITRAC’, and the second layout use 1-Column and be named ‘PUBLITRAC Detail’.
8.The first section contains lead score, keyword, black listed info, department, sources, unsubscribe, emails info, etc. You do not have to add all fields; only choose the ones that will be useful for your organization.
9.The second section contains detailed information about the actions performed online by your leads. You’ll be able to see what action they have performed online through your PUBLITRAC campaigns.
10.Once you are done with placing your information, save and then you’ll see the 2 panels appear in the leads details. If you wish to synchronize your contacts as well, you should do the same process with the
...
Contact section to obtain the same information.
The setup is completed, now for each leads the users will have access to more information about your leads interests, personal information and behaviors.
Questionnaire SalesForce-Integration EN.docx.doc
Contact section to obtain the same information.
The setup is completed, now for each leads the users will have access to more information about your leads interests, personal information and behaviors.
Related articles
| Filtrer par étiquette (contenu par étiquette) | ||||||||||
|---|---|---|---|---|---|---|---|---|---|---|
|
...
|