How do I create a hosted form?
1. From the top menu bar, select Content.
2. Select the submenu Form.
3. Click Add.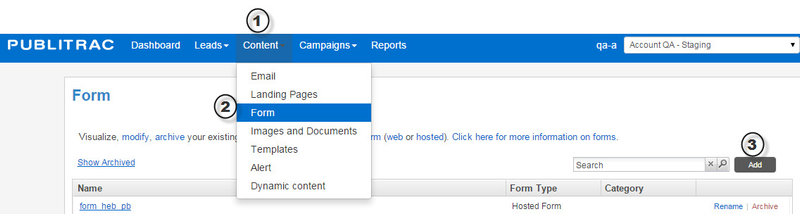
4. Under Form Type, select Hosted form.
5. Enter a Name for your form.
6. Add a Description (optional).
7. Select one of the two options below When form is submitted. Re-Route to a Thank you page is recommended for most forms.
8. Select the URL of the page you wish to redirect your users to from the drop-down menu. You may also type in or copy-paste the URL in question.
9. Click Next.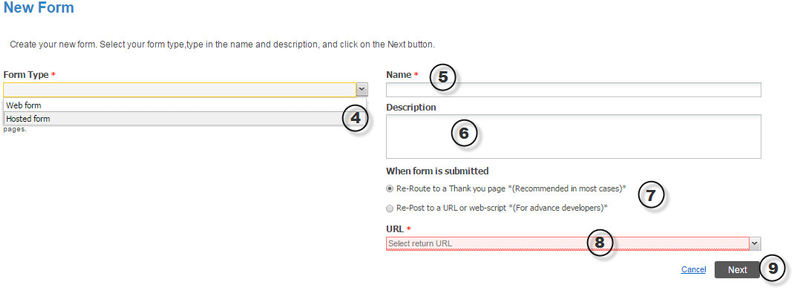
10. Under Steps, Select form language between English and French (Canadian).
11. Click on Design form.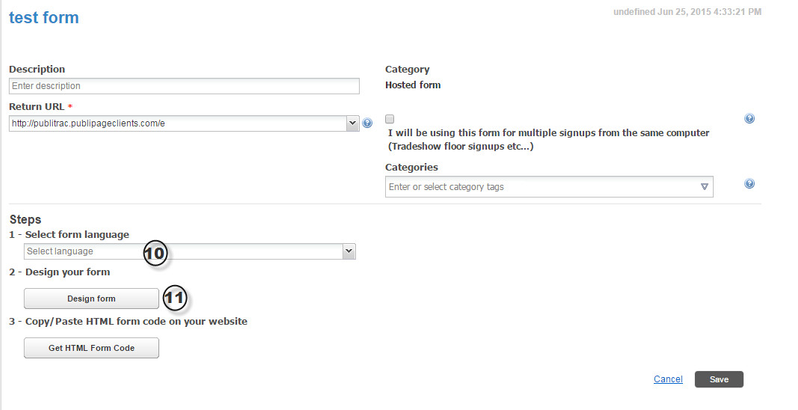
12. In the new window, select the desired field in the Form Fields section.
13. Drag and drop the field to the section to the left.
14. Make any required modifications to the default settings of each field under the Configurations section by clicking on the desired field (a selected field will be grey). Ex. Specify which fields are not required by selecting the False Value.
15. Modify the order of the fields by using the green arrows to the right of each field , or delete any field by clicking on the red x icon .
16. When you've completed your selection, click Save. 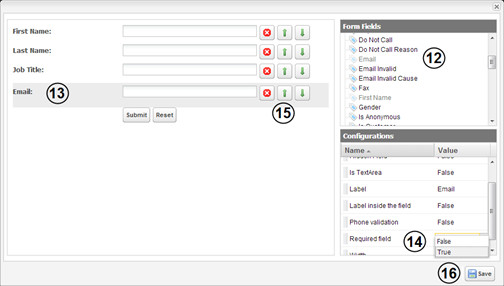
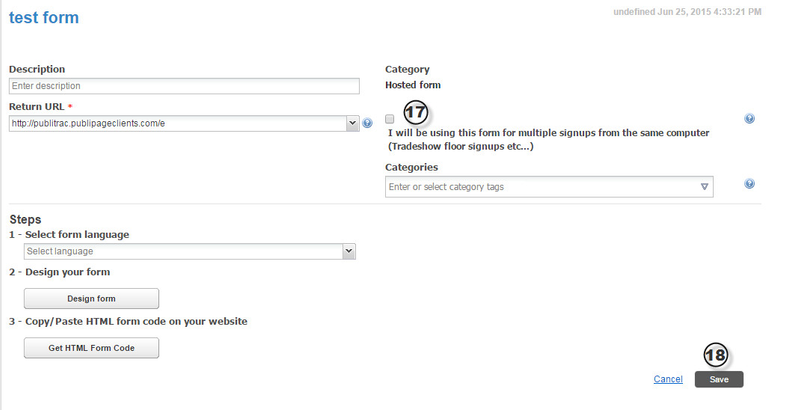
17. Check the field I will be using this form for multiple signups from the same computer (Tradeshow floor signups etc...) if applicable (optional).
18. Click Save.
*For contest type forms, consult the laws and regulations on the régie des loteries et des courses du Québec website : https://www.racj.gouv.qc.ca/index.php?id=76&L=1
**It is very important to note that a newsletter subscription box must never be checked by default, it must always be empty.
Once you have created your hosted form, you may either:
- insert it on one of the pages of your website or
- insert it on a landing page created in PUBLITRAC.
Related articles