How to convert a .XLSX file to a .CSV file
Note: The Import of a csv in PUBLITRAC is limited to files of 75 000 lines maximum. Make sure that the csv files to import do not exceed this limit. If not, split your files and make more than one import.
Procedure:
Before converting your .XLSX (Excel) file to a .CSV:
- Verify that the address, city and province are shown in separate columns.
- Verify that the cells do not contain more than one email address.
- Verify that all email addresses contain the @.
- Verify that there are no unnecessary spaces in the cells (meaning that there is no Alt+Enter).
- Verify that the phone numbers are separated by spaces or dashes.
- Verify that in the first line of your list, for each column, there is a title, without a space or special characters (Example: name_client or postal_code).
- Your list must contain at least 2 columns.
- Remove all empty lines.
- Verify that all the dates respect the format: AAAA-MM-JJ.
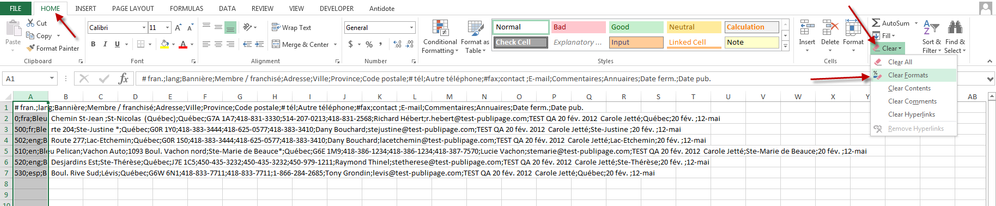
- Make sure to erase all values or formulas from the cells. Do Ctrl+A to select all cells and then go in your Excel under the 'Home' menu, then "Clear" and choose the 'Clear Formats’ option (see the example below).
- Verify that there are no Roman numerals.
- Ensure that all numbers are written in figures, not in words (you have to write 14 and not fourteen)
- If you want to import a list containing fields that do not already exist by default in PUBLITRAC, make sure to create the custom fields before importing the list. See 6-Configuration / Configure custom fields.
- Users with a sales rep access can visualize the leads that have been assigned to them, however they cannot import lists.
- Make sure the fields are not too long. Consult the lexicon.
- Ensure there are no bold, italic or underline formatting.
Convert your .XLSX (Excel) file in a .CSV file:
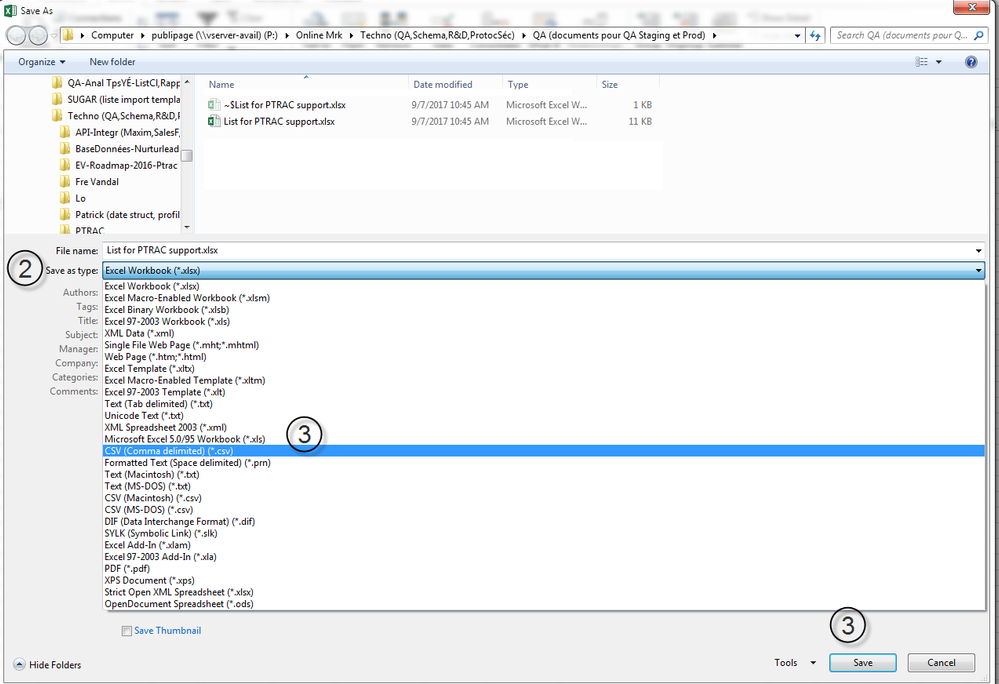
1. Open your .XLSX file and click on Save as.
2. Click on Save as type.
3. Choose .CSV (semicolon separater) (*.CSV) and Save.
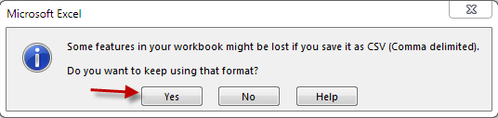
The screen below appears. Choose Yes.
You then see you csv file on the screen.
Convert a .CSV standard file (data in a cell but separated by semicolons) to a .CSV by column file (such as an Excel)
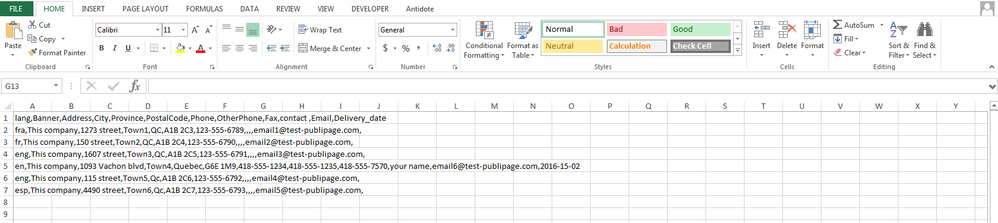
A .CSV standard file will be as follows:
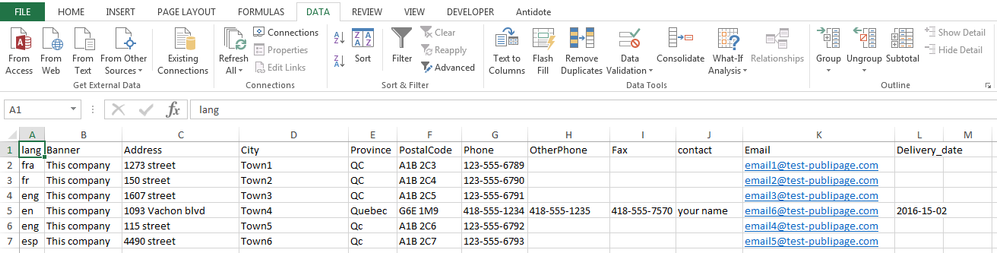
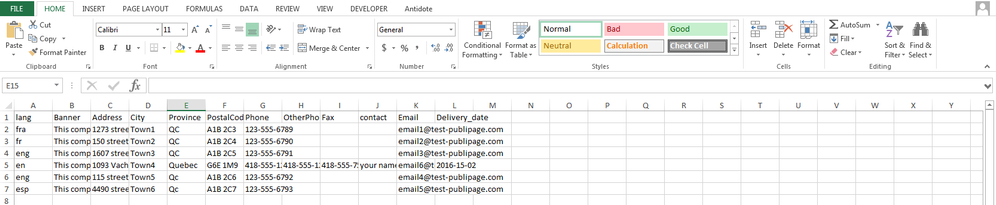
This same .CSV by column file will be displayed as an Excel workbook. As follows:
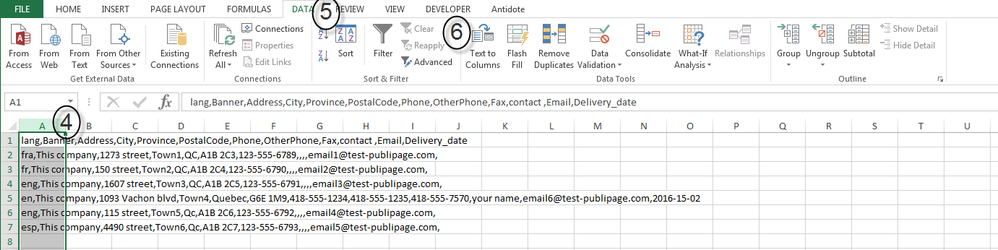
4. In the standard .CSV file, select the first column (A).
5. Open the Data tab.
6. Click Text to Columns.
The Conversion Wizard screen is displayed.
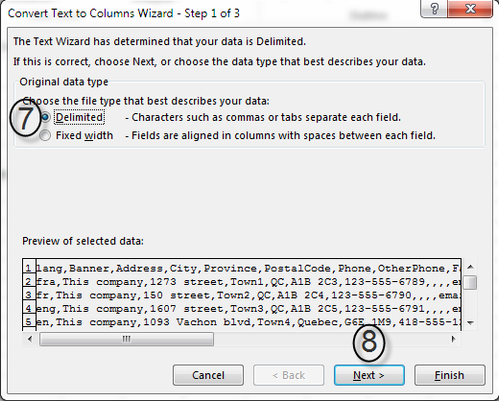
7. Click the file type you want to convert. In our example, we will click on the delimited file type because our .CSV file (see screen above point 4) contains commas and tabs separating each field. If our .CSV file displayed the fields in columns and separated by spaces (see example below), we would have clicked on Fixed width.
8. Click Next.
The screen below appears.
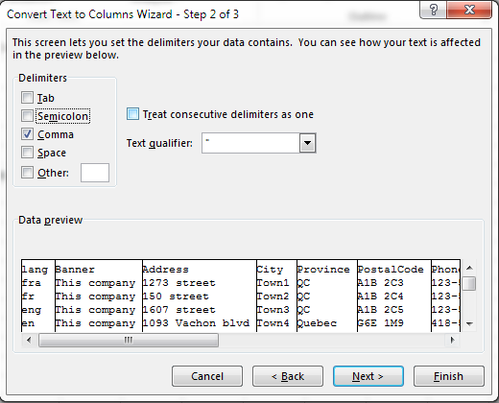
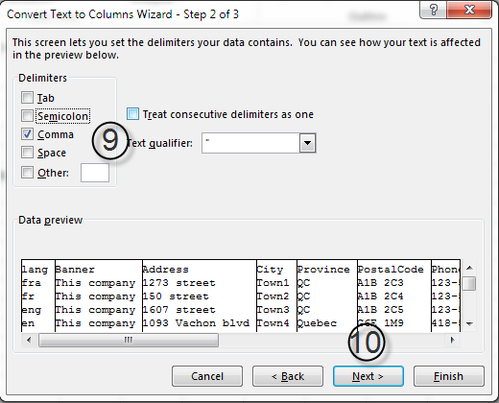
9. Choose Semi-colon or Comma depending on what separates your values on your .CSV and make sure that the text qualifier shows “.
10. Click Next.
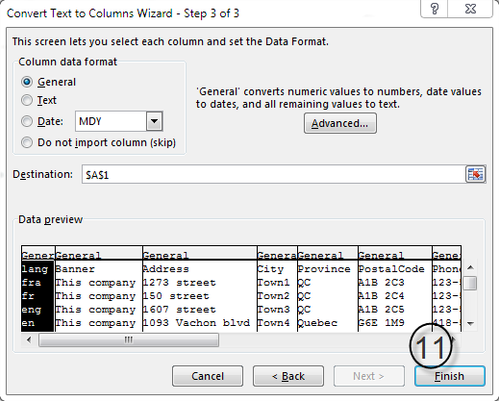
11. Click Finish.
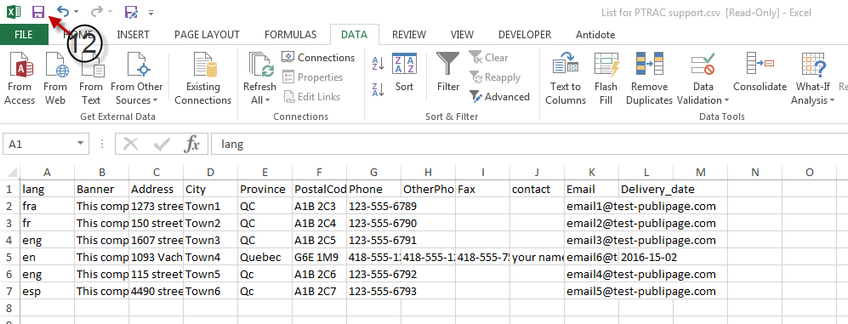
Your file is displayed in the columns mode.
12. Click Save to save your file.
An import is limited to files of 75 000 lines. Make sure that your csv files to import do not exceed this limit. If not, split your files and make more than one import.
If you use an API to import your leads, see our Lexicon for the formats of all the default (native) fields available.