Web form (hosted on your servers)
Create a web form (form hosted on your servers)
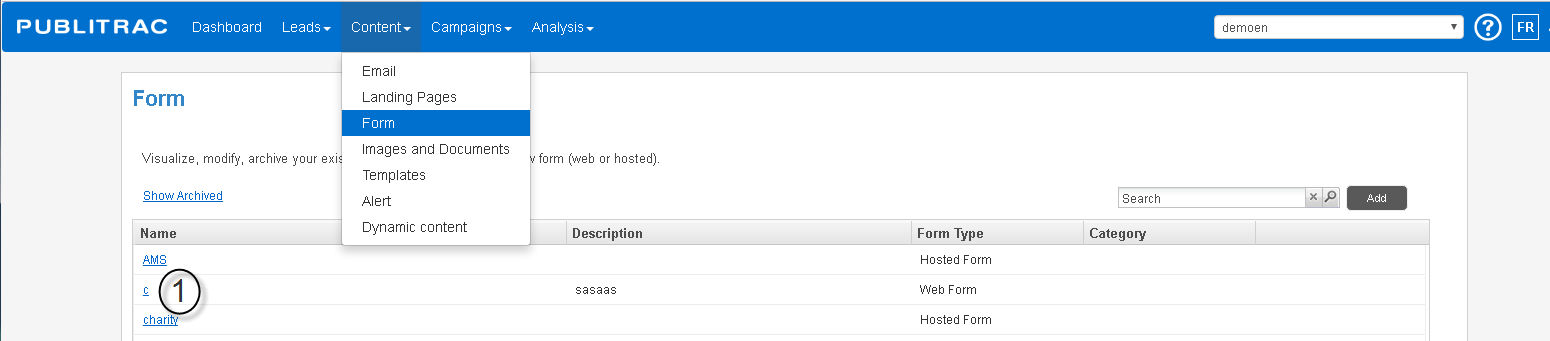
1. Select Content.
2. Select Form.
3. Click Add.

The New Form window below will be displayed.
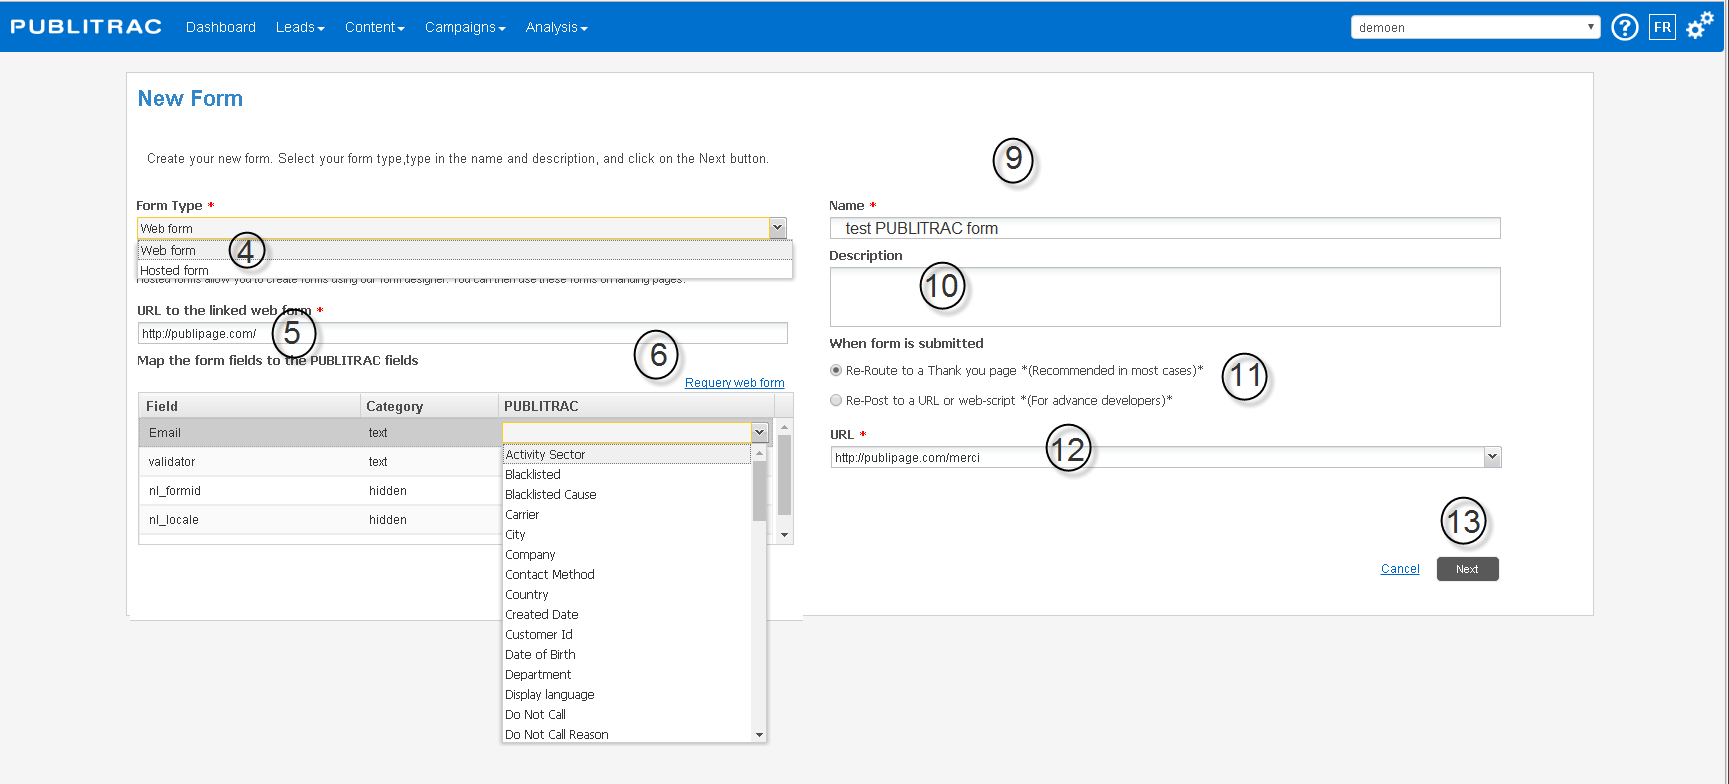 4. Select Web Form from the Type of form * drop-down menu.
5. Enter the URL in the Web Form*, being the URL of the page from the web form you want to integrate.
6. Click Requery web form.
If there is more than one form on the page, the Selection of a form window is displayed. Otherwise, you go directly to point 7.
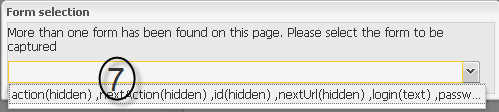
7. Select the form to integrate into PUBLITRAC from the drop-down menu. In our example, we chose the form action (hidden), next action (hidden), id (hidden), nextUrl (hidden), login (text). This method allows PUBLITRAC to identify the web page containing the form and to link the good form to your PUBLITRAC database.
The window Match your fields in the form to the PUBLITRAC fields below is displayed.
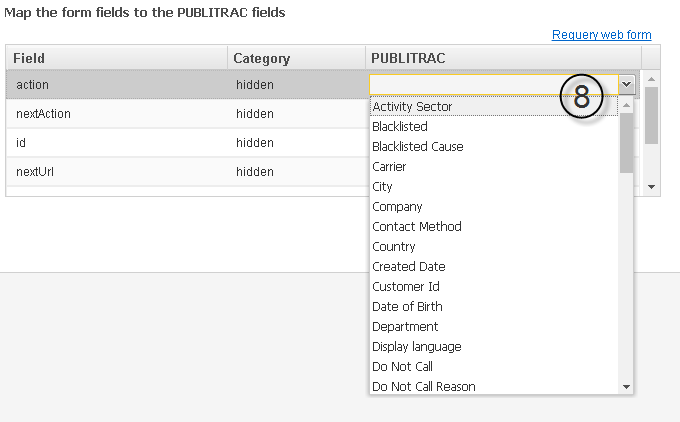
8. Double-click in the column, PUBLITRAC. A drop-down menu will allow you to associate the fields in the form to the PUBLITRAC fields. In this case, we assign the PUBLITRAC Activity Sectorfield to the form Action field.
9. Name* your web form.
10. Add a Description (optional).
11. Select one of the following two options under: When the form is submitted:
Redirect to the thank you page (Recommended in most cases) *. This option will automatically trigger the sending of a web page that you will have configured according to your needs. For example, We have received your completed form or Thank you for completing this form , ...
Redirect to a URL or to a web script *(For experienced developers) *. The difference with the thank you page option is that you have the choice to direct to a landing page or to a web process that you have developed. An experienced developer should be involved in the execution of this redirection.
12. If you chose the option Redirect to a URL or to a web script in point 10, enter the URL* of the landing page you want to send to the lead who will have completed the form. For example, the landing page 'We have received your completed form' can be displayed to the user as soon as a form will have been completed and submitted. You can also enter another URL (or copy and paste) which will direct you to a landing page which does not exist in the drop-down menu.
13. Click Next.
14. The window below, with the name of the web form at the top left of the page is displayed. In this example, the title of the form is Test Support PTRAC.
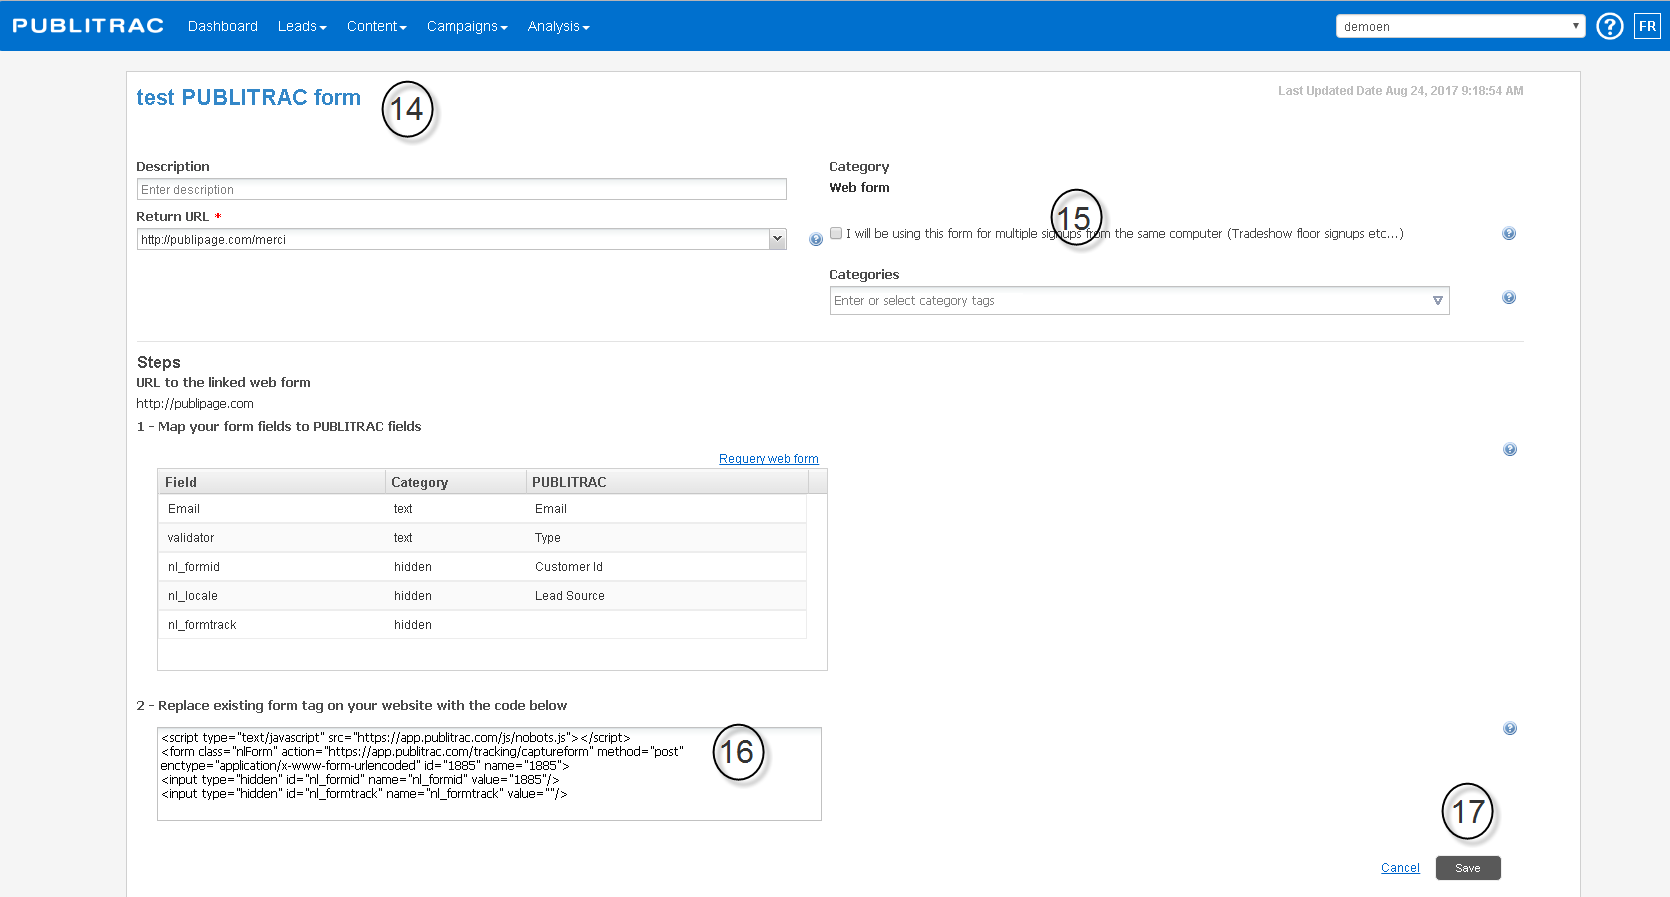
15. Check off the box I will be using this form for multiple signups from the same computer (Tradeshow floor signups etc...) (if applicable) under Category Web Form. Manage multiple listings is used when multiple users share a same workstation. So, multiple users on an IP address or if you prefer, more than one user on a same computer.
16. If you want to synchronize the information present in your web form with PUBLITRAC, copy the code appearing under Replace the form tag on your web site with the code below and paste it into the html (or source code) of your website to replace the current tag of your form. In doing so, the information entered in the web form on your website will be synchronized with the corresponding fields in PUBLITRAC.
17. Click Save.
Modify a web form
1. Click on the web form that you want to edit from the list of forms under Content / Form.
In the example below, we have selected the form "c" that displays as follows:

2. Update the Description, the return URL* and/or the Categories.
3. If you have placed the updated form on your web site, click Requery web form and/or update the PUBLITRAC fields associated with each field.
4. If you made a change to the fields in the form, you need to copy and paste the updated HTML code on your web page.
5. Click Save.