Email (test using Preview or test campaign)
To be completed later with Michel Frigon
Four steps are required:
Step 1. Create your test group
Step 2. Import your test list in PUBLITRAC
Step 3 a. Test your emails via Preview group (does not allow to see the results of the information flags, such as {{tag;Default=}}
OR
Step 3b. Test your emails via a test campaign (allows to see the results of the information tags, such as {{tag;Default=}}
Step 4. Activate your test campaign
Step 1. Create your test group
1. Click on the ![]() icon (top right hand corner of the screen), then click on Settings.
icon (top right hand corner of the screen), then click on Settings.
2. Select the Email test groups tab.
3. Click Add.
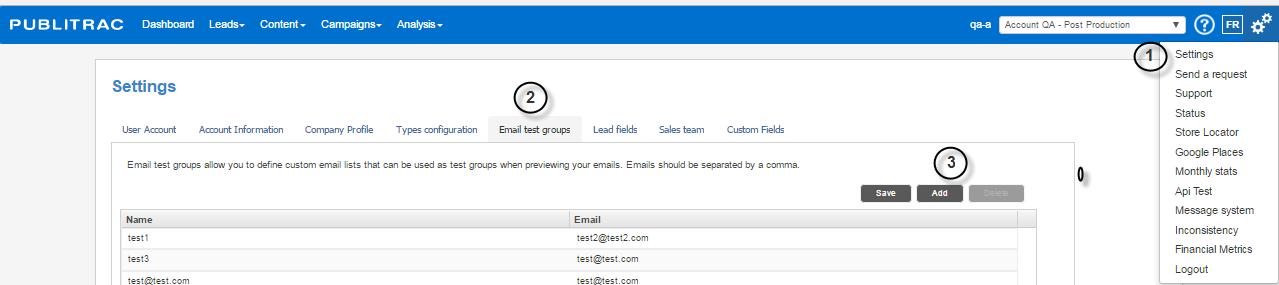
The screen below appears.
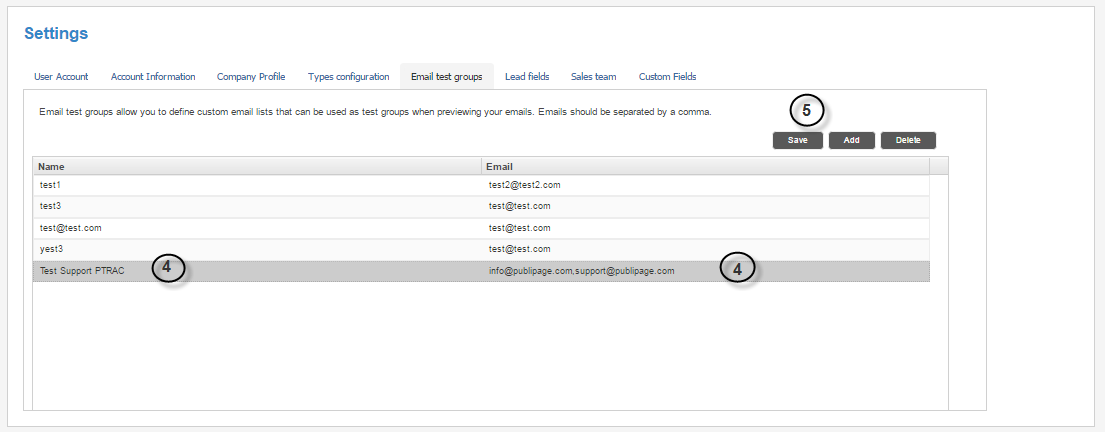
4. Enter the name for your test group (in our example: Test support PTRAC) and the email addresses to include in this test group (in our example: info@publipage.com, support@publipage.com). We recommend setting a minimum of 25 test email addresses from different email clients (Gmail, Hotmail, Yahoo,..., and your company’s).
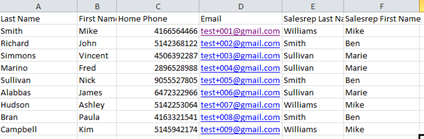
To do this, using a spreadsheet (Excel for example),create a list of email addresses with a minimum of 25 email addresses (see example below). For the GMail accounts, you can create test email addresses by adding a + 001 before the "@" for each lead. For example: test+001@gmail.com, test+002@gmail.com, etc. These emails will be sent to the address test@gmail.com .
For other email domains (@hotmail @Yahoo, @your own domain), you need to create the necessary addresses as separate accounts. The email addresses of a same test group must be separated by a comma and a test group cannot contain more than 250 characters. Make sure that your test list contains the same fields as the fields stored in the list of leads who will receive real email. In our example, we have the following fields: Name, First name, Telephone, Email, salesperson`s name and first name.
5. Click Save.
Step 2. Import your test list in PUBLITRAC
Export your Excel list in .CSV format and import it into PUBLITRAC. In our example, we call the list, Test campaign list.
a. From the main menu, choose Leads / Leads/Customers.
b. Select the List Management tab
c. Click Add.

The screen below appears.
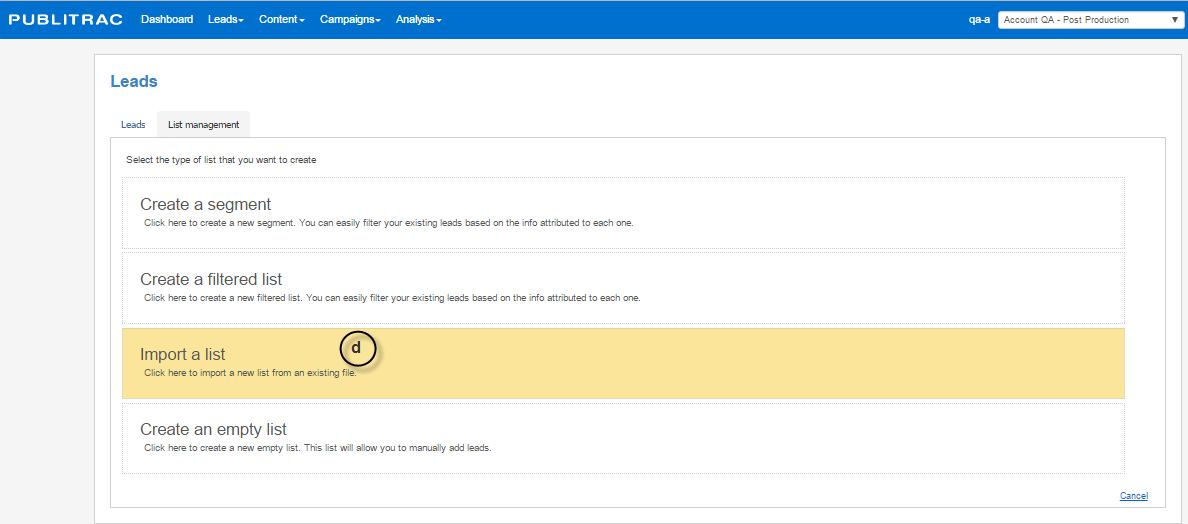
d. Select Import a list.
The screen below appears.
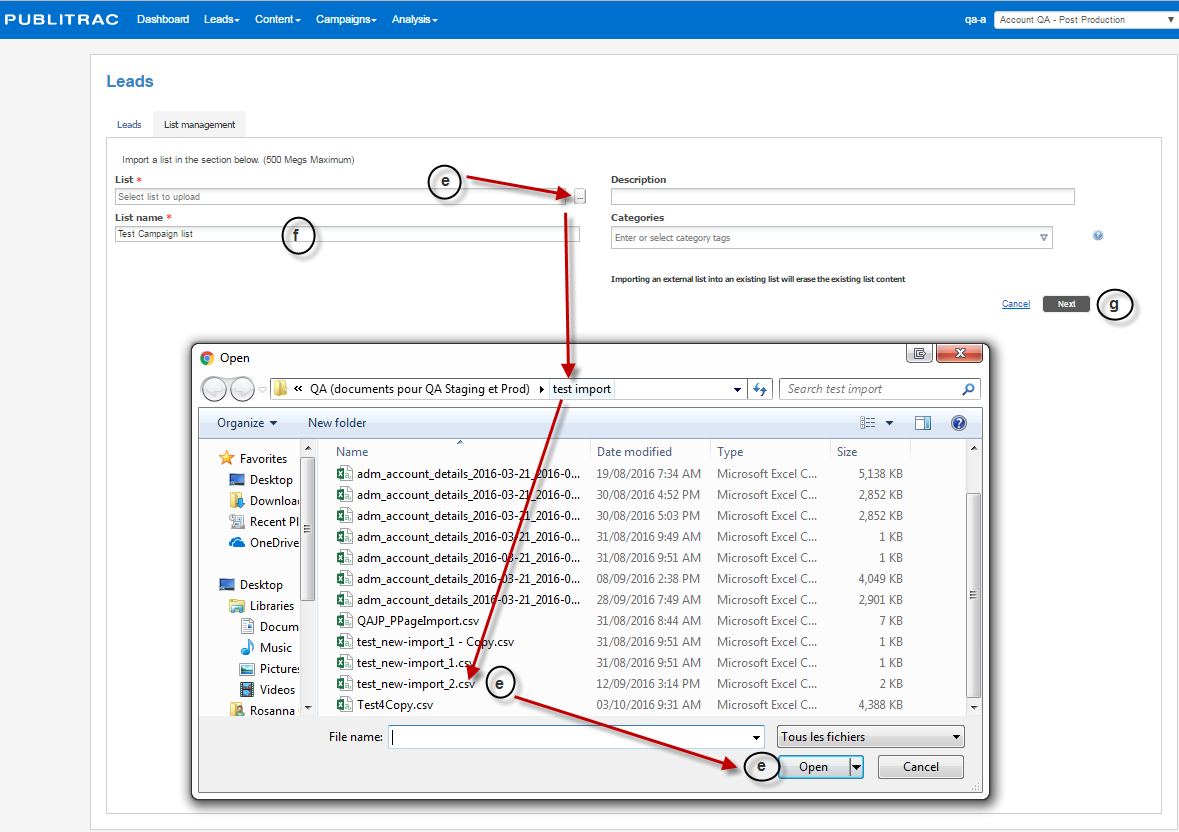
e. Select the list to import from your workstation by clicking on the browse icon ![]() to the right of the List line. The exploration window on your workstation opens. Choose the file you want and click Open.
to the right of the List line. The exploration window on your workstation opens. Choose the file you want and click Open.
f. Name the list *. In our example, we use the name Test campaign list.
g. Click Next.
The screen below appears.
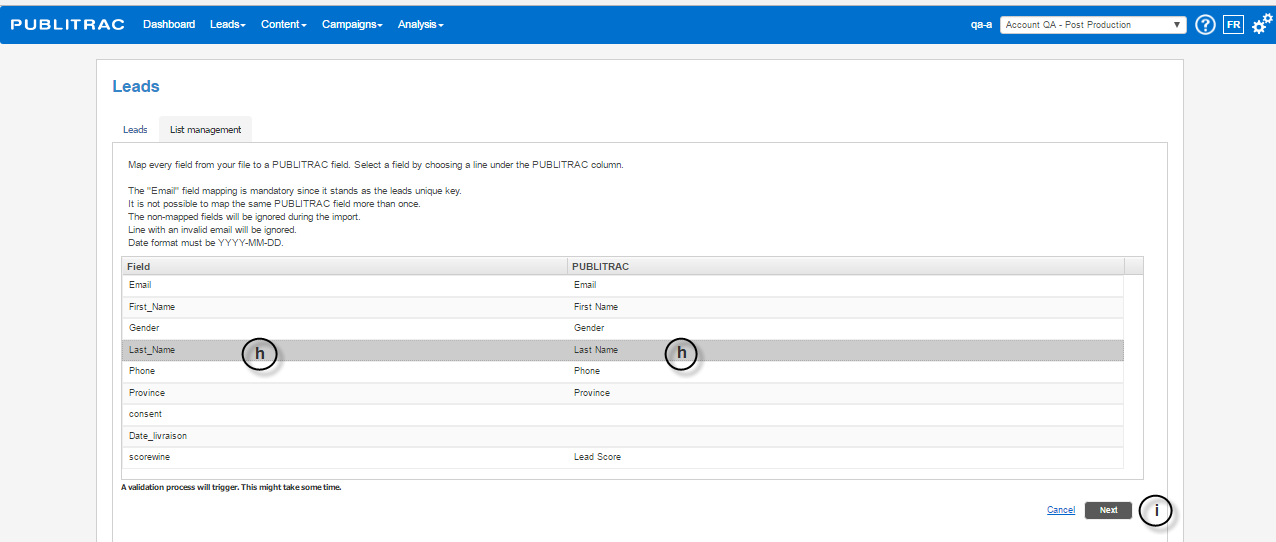
h. Make sure that each field in your list (left column) has a PUBLITRAC equivalent (right column). A non-assigned field in the PUBLITRAC column will not be imported.
i. Click Next.
The screen below appears.
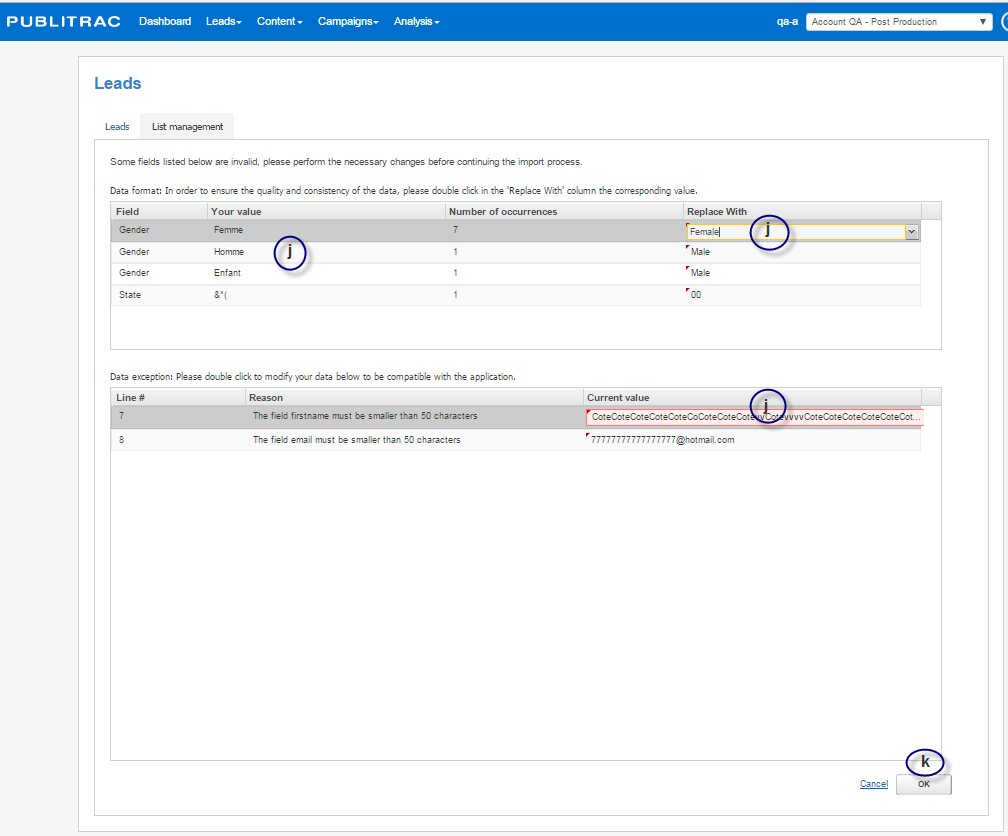
j. If you have non-standard values for certain fields, these exceptions will be displayed and you will have to provide replacement values. For example, Beer is not a language, therefore, identify to PUBLITRAC that when it sees Beer, it needs to put French in the field. Ditto for Coffee which needs to put English in the field.
k. Click OK.
The screen below appears.
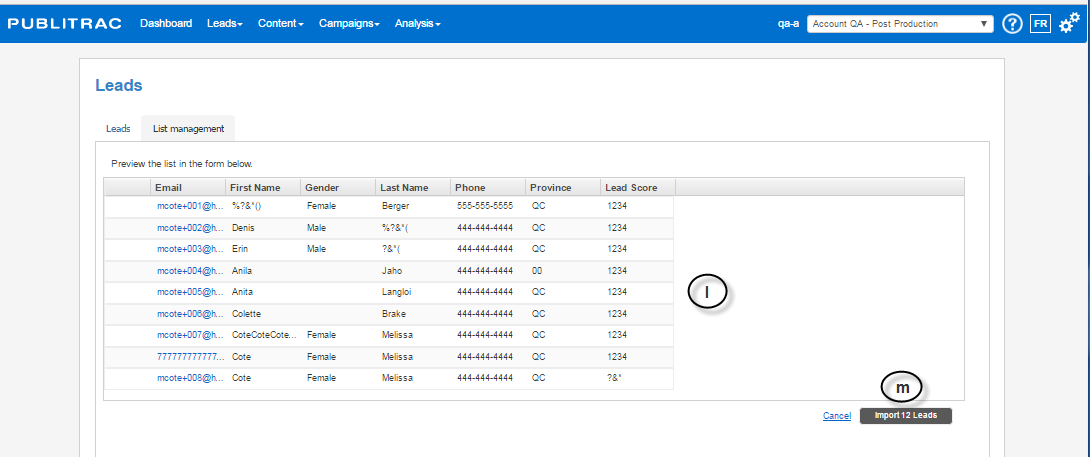
l. The display then shows an example of a dozen emails that will be imported.
m. If everything is according to your original list, click Import xx leads.
The current import window is displayed.
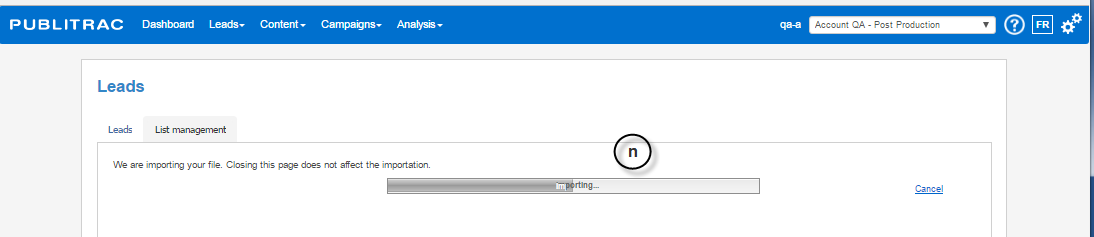
n. You can exit this screen and the importation will continue in the background.
o. Once the import process completed, your list will appear on the screen.
Step 3 a. Test your emails via a Preview group (when an email is being viewed in Preview mode, you will not be able to test certain tags and special links, because these links are generated by the sending server). To view and test all your tags and special links, validate your email by a test campaign email (see Step 3 b . Test your emails via a test campaign).
An email sent in preview mode always contains the word OVERVIEW in the beginning of the subject line. Tags containing lead information will always contain information related to the first lead of your database (the first lead is one that is taken by default). The preview mode serves only to see the visual of an email and can in no way serve as a final test for multiple functions found on an email.
The deactivated tags and links when doing a PREVIEW are the following: Unsubscribe and Refer a Friend.
To send a Preview:
1. Select Content, then Email.
2. Select the desired email.
The screen below appears.
3. Click Preview.
The screen below appears.
4. Select the Test group you created earlier from the drop-down menu.
5. Click OK.
6. A Successful message appears to indicate that your email was successfully sent to the email addresses included in your test group.
Note: an email viewed in Preview mode does not go through the email sending server and as a result, you will not be able to test some tags and special links because these links are generated by the sending server. To see and test all your tags and special links, you will need to test your email by a test campaign email.
Step 3b. Test your emails via a test campaign (allows you to see the results of tag information such as {{tag;Default=}}
a. Select Campaigns, then Configuration automated campaigns.
b. Click Add.
The screen below appears.
c. Name the campaign *. In our example Campaign on test list.
d. Enter a Category *. In our example, Email.
e. Click Next.
The screen below appears.
f. Select Lists.
The screen below appears.
g. Select your campaign test list created previously.
h. Click Next.
The screen below appears.
i. See on which list the campaign will be executed and how many leads will be affected by this campaign. In our example, the campaign will be executed on the Campaign test list and on 24 leads.
j. Return to the Automation tab.
The screen below appears.
k. Click on the Send email {x} activity and slide to the left on the file Begin.
The screen below appears.
l. Select email to test.
m. Click OK.
The screen below appears.
Step 4. Activate your test campaign
n. Select the Details tab.
o. Click Activate.
The email you will receive should include all the variable tags depending on the test leads that you have created. For example, if you used the tag {{FirstName; Default =}}, the email should display the name of the test lead to the place of the tag. Validate the result of your test campaign by following the below checklist:
Validate the elements of the test campaign
The correct email has been received
The subject of the email is correct
The content of the email is correct
The links in the email work
Online viewing works
The "unsubscribe" link works
The mailing address is present
Validation of the leads affected by the transmission
Campaign run on a list
The campaign is associated with the good lists
The number of valid leads are included in your mailing lists
Campaign run on a trigger
The campaign is associated with the right trigger
Validate the number of valid leads who will be affected
Validation of the automation process
Test any link that you included in your email to ensure that each one is working well
If you have successfully validated these steps, you can Save your campaign.
p. Click Save.
Delete an email test group
1. Click the icon (top right corner of the screen), then Configuration
2. Select the Test email tab.
3. Choose the test that you want to delete.
4. Click Delete.
 TIPS
TIPS
- An email viewed in Preview mode does not allow to test the tags and special links in your emails as these tags and special links are generated by the sending email server (preview passes through the sending). To test your emails’ tags and special links, you must create a campaign that will send a test email.
- It is not possible to recall an unopened email after it has been sent from PUBLITRAC. There are however functions in the mail Exchange servers and in Gmail’s lab options enabling the cancellation of a transmission. On the other hand, this operation must be done extremely quickly and it is almost impossible to achieve.
- It is not possible to remove leads from reports when they have already received the email. The only way to filter internal leads (your employees, for example) is to not include them in the email transmission in the first place. Internal leads should be part of a separate transmission sent prior to test the campaign.
- Receive test email in both French and English. For example, create an account in Gmail and another in Hotmail, two free services which allow you to create different email addresses. As the email address is your unicity key, we can put two different languages on a same lead. You then create a new contact in PUBLITRAC, always with your name, but with the new email you created. Indicate the language of your choice for this 2nd email. By having your two contacts in the mailing lists, you will receive the email assigned to the French and the one assigned to the English.
You can also do the following: If you do a test campaign and send it to a particular list, you choose the option Send email x twice put the French and English email.
- Click the following link to view the Publipage blog post: http://publipage.com/blog/courriel-marketing/lanatomie-DUN-courriel-Parfait/